Using New Relic with EPiServer 7+
Since a few months I am installing New Relic for all new projects I develop. I hope we all know how awesome New Relic is and if you do not know, go check it out. Since I developed a few new sites in EPiServer 7 and EPiServer 7.5 I had to add New Relic functionality to those projects. In this blogpost I would like to tell you how I did this so that maybe it can help you in the future.
Install New Relic in your solution
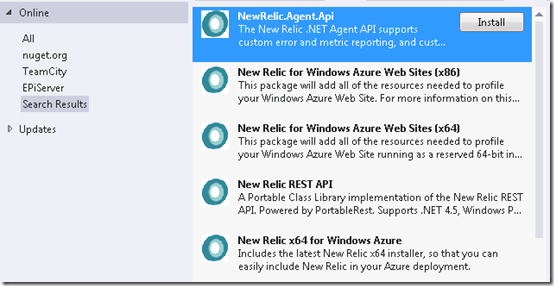
Installing New Relic in your project is very easy. Just get the NuGet package from NuGet.org and pick NewRelic.Agent.Api.

If you are using an Azure website or webrole, make sure you follow the New Relic documentation on that matter. I won't go into that further.
When using New Relic, it needs to be told for which application it is gathering information. Therefore this next line should be in your appSettings:
<add key="NewRelic.AppName" value=""/>
After this you have New Relic installed in your project and you can use it. It's that simple. However, there are some nice extension possibilities which we can use to get more out of New Relic.
HTTP module
To help New Relic gather all the information needed it should be helped a little bit. It works great with standard WebForms or MVC applications but with Content Management Systems which create dynamic URLs it works a little bit different. For example, a single EPiServer instance can contain multiple websites. When you do nothing about that, New Relic does not know which site is being used and all your data is aggregated on one giant heap. To fix that you can create a HTTP module which is fairly easy to understand and implement.
public class NewRelicHttpModule : IHttpModule
{
      public void Init(HttpApplication context)
      {
           context.AuthenticateRequest += this.OnAuthenticateRequest;
     }

     public void Dispose()
     {
     }
     /// <summary>
     /// Catch the authenticate request. This is the only event in which the new transaction name can be set.
     /// </summary>
     /// <param name="sender"></param>
     /// <param name="eventArgs"></param>
     private void OnAuthenticateRequest(object sender, EventArgs eventArgs)
     {
         string sitename = SiteDefinition.Current.Name;
         if (EPiServer.Configuration.Settings.Instance == null || String.IsNullOrWhiteSpace(sitename)) return; //maybe specify url's which do not need to be reported to New Relic
         const string CATEGORY = "Uri";
         string path = HttpContext.Current.Request.Url.AbsolutePath;
         // Set the path to '/Home' if empty. Otherwise 'Root Path' will be reported in the New Relic dashboard without any site indication.
         if (path.Length == 0) path = "/Home";
         string transaction = String.Format("[{0}]{1}", sitename, path);
         NewRelic.Api.Agent.NewRelic.SetTransactionName(CATEGORY, transaction);
     }

}
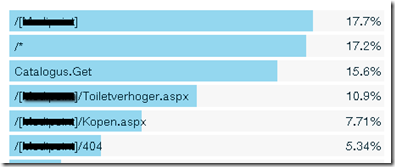
As you can see in the code snippet above, you could decide not to log a specific url if needed. Also, in the transaction variable, the site name which is resolved by EPiServer is injected in the transaction name. That way you will always know which site is being used.

In the screenshot above you can see how the transactions are being logged in New Relic. Also notice the Catalogus.Get method. This is a separate WebAPI call which, in this application, is excluded in the HTTP module.
Once you are done, you only need to add the HTTP module to your system.webServer/modules node in your web.config.
<add name="NewRelic" type="Framework.Core.Performance.NewRelicHttpModule, Framework.Core"/>
Log4Net appender
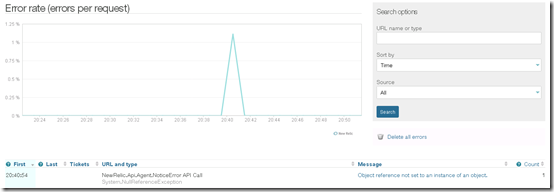
When a 500 error occurs you probably want to log this in New Relic. That way it gives you inside in your application and as a bonus you can configure some alerts so that you receive an e-mail or text message when your application is throwing too many exceptions. To let New Relic know when an exception is thrown I created a simple Log4Net appender which sends the exception to New Relic when a message with the loglevel ERROR or FATAL is logged.
public class NewRelicAppender : AppenderSkeleton
{
     protected override void Append(LoggingEvent loggingEvent)
     {
         if (loggingEvent == null) return;
         if (loggingEvent.Level == Level.Error || loggingEvent.Level == Level.Fatal)
         {
             NewRelic.Api.Agent.NewRelic.NoticeError(loggingEvent.ExceptionObject);
         }
     }
}
As you can see, very easy. You can pass in the ExceptionObject directly into the NoticeError method of the New Relic API. 
Just add the appender to your EPiServerLog.config:
<appender name="NewRelicAppender"
type="Framework.Core.Diagnostics.NewRelicAppender">
     <threshold value="ERROR"/>
</appender>
<root>
     <level value="INFO" />
     <appender-ref ref="NewRelicAppender" />
</root>
Other cool New Relic goodies
New Relic has a lot more interesting features you should check out. You could Record metrics or increment counters. Check out the New Relic API documentation
I hope this blog can help you implement New Relic. If you have any questions or comments, feel free to enter them below.

Nice! And with Commerce projects, you could add even more interesting data, like purchase amounts. Seeing the revenue go down when the error count increases typically helps customer prioritize fixing it.
Indeed evest, in this particular project I added a RecordResponseTimeMetric method to my webservice class. In my async method to a external REST webservice i created a stopwatch and returned a Tuple.
After that I sent this info to New Relic:
NewRelic.Api.Agent.NewRelic.RecordResponseTimeMetric(String.Format("Custom/{0}", newRelicCounterName), response.Item2.Milliseconds);