
Integrate a CMP workflow step with CMS
As you might know Optimizely has an integration where you can create and edit pages in the CMS directly from the CMP. One of the benefits of this is that the marketing team can use the nice workflows in CMP for both the creation and approval process of new content to the CMS.
But what if you want to use the CMP workflows for work that are not directly related to creating or editing a new page in the CMS? Perhaps you want an editor who works in CMS, but who does not have access to CMP, to update a piece of content or change a setting that is not connected to a specific page.
CMP has a built-in feature for so-called external workflow steps. This means that you can integrate workflow steps in the CMP that are managed completely outside the CMP. For example, there are ready-made connections to Jira and to Adobe CC for this purpose.
This blog post describes how Kunal and I created the corresponding connection between CMP and CMS. The integration is not tied to working on a specific page or block in the CMS that is selected from CMP. The task can include any kind of instructions to update of one or more content items on the web site. The editor in CMS doesn't need to login to CMP to read the instructions or to mark the task as done, this is completely managed in CMS.
Features
- The editor in CMP can create a task that will be be managed in CMS
- When an external workflow step is triggered it is reflected under "Tasks" in the CMS
- The CMS user can update the status of the task in the CMP
- With this integration one CMP instance can connect to multiple instances of CMS
Configuration
1. CMP
- You need administration permissions to configure the integration in CMP.
1.1 Create an App
Give your app a name ("My-CMS") and input the public url of your website. The callback url can be left empty or set to the same url.
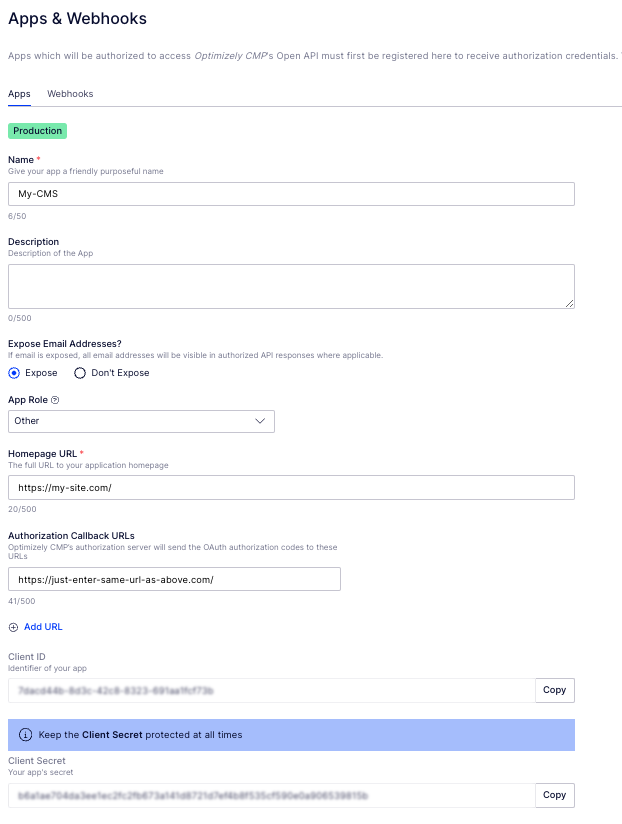
Once you have created an App, you should get a ClientId and a ClientSecret. These will be required for the CMS configuration.
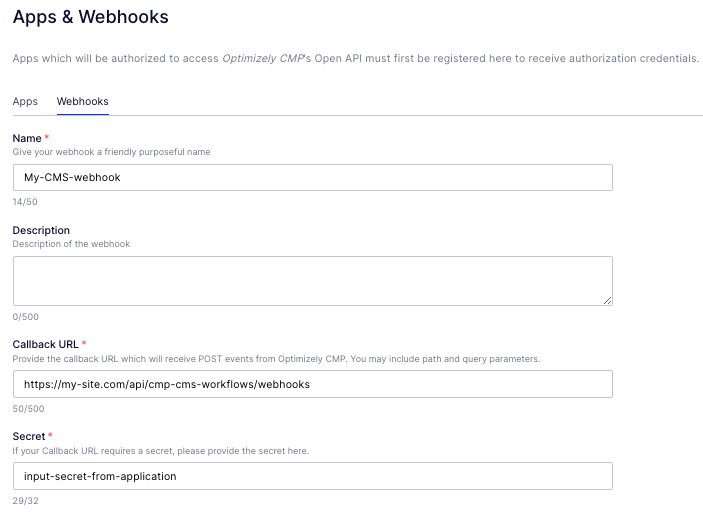
1.2 Register a Webhook
Create a new Webhook and give it a name ("My-CMS-Webhook"). As the Callback url enter the url to to your site and append the webhook: /api/cmp-cms-workflows/webhooks
https://my-site.com/api/cmp-cms-workflows/webhooks
Note: Your CMS instance needs to have a public facing url for the CMP to be able to send Webhook notifications.
For Secret, you can use the value you generated when creating the App or set a new value.
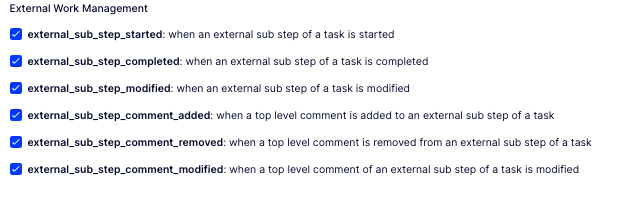
Select the below events. Make sure that you only check the "External Work Management" events.
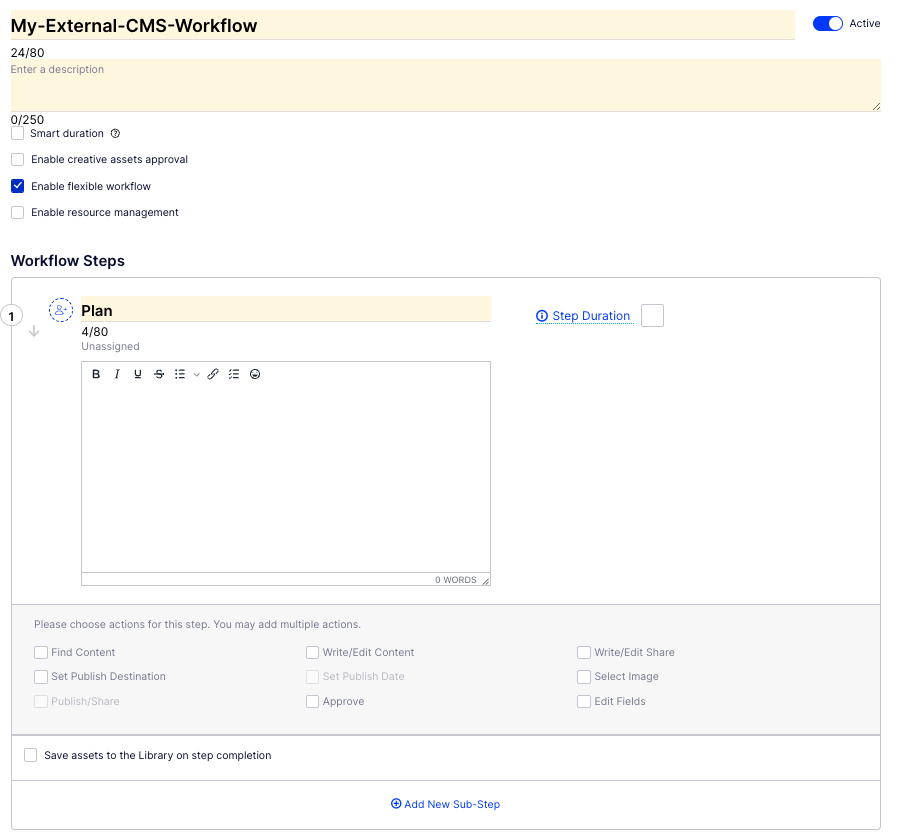
1.3 Create a Workflow with External Step
Create a new workflow. One of the steps should be an external step. In this example we create a workflow with three steps: "Plan", "CMS Task", "Publish". The "CMS Task" step is created as an external step.

For the configuration of the External Step, click the "Manage External System" button and give your CMS system a unique name ("My-CMS)". This external system name will be needed when configuring the plugin on the CMS side.

Then select your external system in the "Select external system" dropdown list.
2. CMS
Install the nuget package. The nuget can be found here:
https://nuget.optimizely.com/package/?id=Research.CMP.CMS.Workflows
2.1 AppSettings.json
ClientId and ClientSecret corresponds to the values created in the App in CMP. ExternalSystemID is the name you created for your external system (i e "My-CMS" in the example in the screenshot). The WebhookSecret should match the value from the Webhook settings.
"EPiServer": {
"Cms": {
"CmpCmsWorkflow": {
"ClientId": "client-id",
"ClientSecret": "client-secret",
"ExternalSystemId": "external-system-id",
"WebhookSecret": "secret-from-cmp-webhook"
}
}
}
2.2 Startup.cs
In usings add:
using Research.CMP.CMS.Workflows;
In ConfigureServices(...) add:
services.AddCmpCmsWorkflows();
3. Example
3.1 Create task in CMP
Create a new task in CMP and select your new workflow.
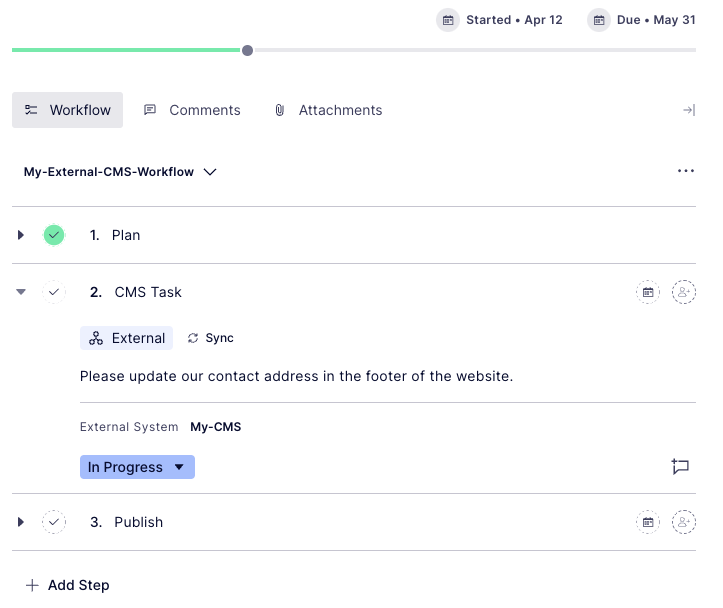
Write the instructions of the task you want the CMS editor to perform as the description of the external step. In this case, the task is to update the company address in the footer of the website. Hit the Sync button.
3.2 Perform the task in CMS
The editor in CMS will now see the new task in the task pane.
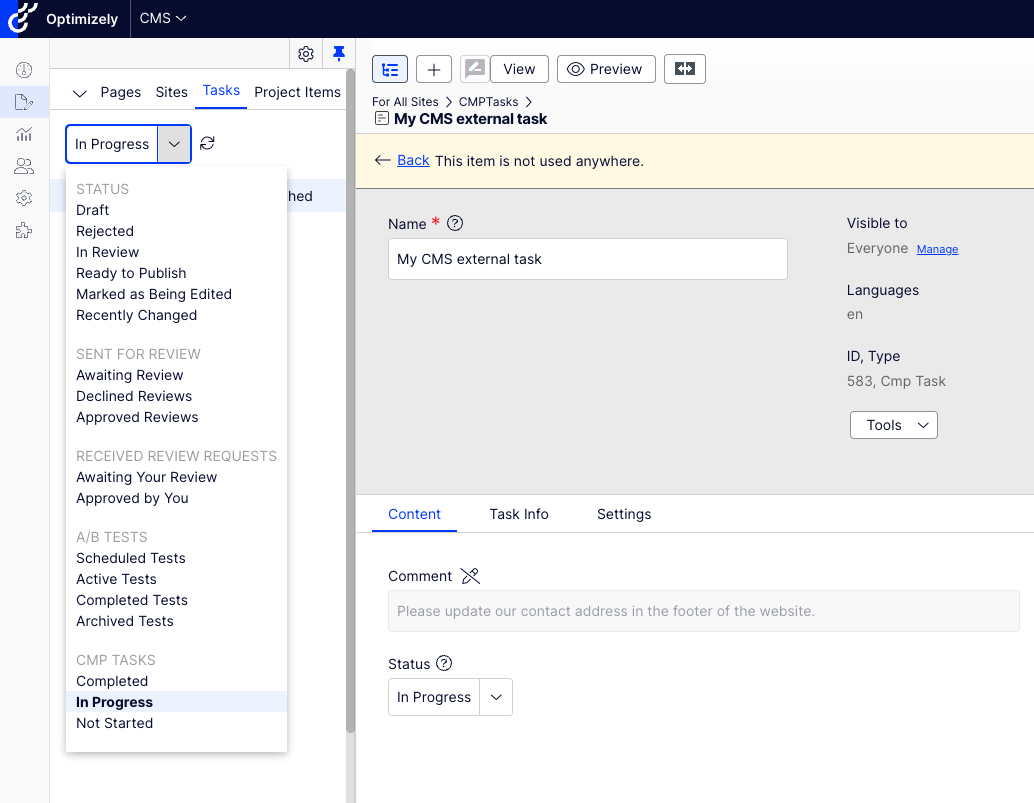
Click the task to read the instructions. Perform the task, then come back to the task instructions, and update the status from "InProgress" to "Completed" and then click the Publish button.
The step in CMP will now be marked as Completed.
Note: The nuget package will create a new Block type called CMP Task, that are also stored in a folder called CMPTasks.
The integration is available on our nuget feed for installation (CMS 12 required):
https://nuget.optimizely.com/package/?id=Research.CMP.CMS.Workflows
Full source code is also available at Github together with Readme including the details of how to configure the integration.
https://github.com/episerver/Research.CMP.CMS.Workflows/
Do you think this integration should be available as a standard integration? Feel free to comment with any feedback.
Comments